; World of Dennifer: First Birthday
Showing posts with label First Birthday. Show all posts

Thursday, December 29, 2011

Professional pics from Munchkin's 1st birthday party!

Ummm, yah. I'm totally super late delivering these. Life has been so crazy lately, if it's not one thing, it's another & work has got me running around like a chicken with it's head cut off, so I never have time to update during the day. But, one of my 2012 resolutions is to really get back to blogging. We have a bunch of house projects planned for next year, so I should hopefully have a good amount of content to blog about & hopefully some stuff you'll find helpful or that you'll ohhh & ahhh over!

Anywho, I just realized that I never shared some of the professional pics from the munch's birthday party...there were A LOT, I mean like over 200 to choose from, so I'm just going to share a few with y'all so as not to bore you with 5 million pics of my beautiful baby big girl {yes, she's officially a big girl now...more on that later}. I didn't edit them since they are property of the photographer & not mine...


Source/vendors list: photography - a friend I went to college with, Devin Burnette Photography; paper (banner, cupcake toppers, favor tags, stickers) - Ciao Bambino on Etsy; Amaya's bow & bloomers/diaper cover - To Be Stitched on Etsy; Amaya's custom personalized onesie & tutu - Made Cute Just 4 U on Etsy; Amaya's bow leggings - Amy's Buttons & Bows on Etsy; cake - a family friend did it for us :); cupcakes - Cupcakes Actually; decorative balloons & polka dot fruit cups - Shop Sweet LuLu; paper lanterns (in living room) - Luna Bazaar & Party City {pumpkin lanterns}; everything else was either DIY or I'm not thinking of it right now, but if there's something you see or saw in the original post about the big par-tay that I didn't mention in either post, please contact me at worldofdennifer{at}gmail{dot}com & I'll get the info for you stat! Also, don't forget to check out the Pinterest pin board I made for the party - it has lots of inspiration & recipe links. A tutorial for the ribbon topiary is coming up early next year...ya know, since next year is in a mere couple of days. ;)

I'll be back tomorrow with my annual recap of my favorite moments over the year! 'Till next time!

Tuesday, October 25, 2011

The big par-tay...Part I

OMG, I am embarrassed b/c I am THE worst blogger ever in all of blogland. Okay, maybe not all of blogland...but I have been sorta MIA. No real reason, just life got in the way - first the mad dash to get all my DIY crafting & cooking done for her party, the party, the other birthday weekend activities, oh & did I mention I'm now on our HOA's board of directors :oO (?!),  catching up at work, a sick beh be, etc. etc. And I am STILL exhausted from all that...but I do apologize! And now, I give you...

~*The Birthday Girl*~


The party was an awesome success & my little mama had a great time! I got a professional photog to take all the pics & I haven't gotten the photos back from him yet, but I did get a chance to snap a few myself...


Obvs I took these after the party because you don't get the full affect of how cay-ute they are in the sunlight. Made these lil guys based on Emily's tutorial over at Not So Idle Hands. I had this bookmarked for quite some time now & I'm happy I finally tried them out! They are super cute, cheap & easy to make. They take some time, but I made a BUNCH & for this year at least, we aren't carving pumpkins so these cuties are it!

Here are some pics during the party...

{favor table} 
 
{paper lanterns used to decorate in the living room}

 
 {the eats spread + dessert}

The Decor 
As I mentioned in a previous post, Ciao Bambino made most of the paper for the party (the banner, the confetti minis, the favor tags, the cupcake toppers & stickers that I used on the plastic ware rolls - not pictured). I think I mentioned before that I basically bought the paper stuff sight unseen, but I rightly placed my faith in CB because the stuff turned out super duper cuteee! I was so excited when I got my box with all the stuff, it was like Christmas! I got the black & orange polka dot balloons from Shop Sweet LuLu's Halloweenery shop for $3! The black & white paper lanterns are from Luna Bazaar and the totally adorable pumpkin lanterns are from Party City, but they are only available online. If you're feeling crafty, here's a link to a DIY version of them - equally cute & I actually bought all the supplies to make them, but then I gave myself a reality check & returned the stuff, then bought these...I was already overloaded with projects, so I was happy to find these! The paper table cloths were also from Party City.

I DIY'ed the place cards on Power Point & the cake pop stand using a cardboard box & piece of styrofoam wrapped with polka dot wrapping paper & pretty orange ribbon. Speaking of ribbon, I got a lot of the ribbon you see in the photos from the Ribbon Retreat - great prices & they ship fast! All the other ribbon I got from Michaels & Jo-Ann's.

The Food
Instead of getting the party catered, I opted to make everything myself...which was SO much work & thankfully one of my close friends came over the day before the party to help me get a head start on some of the baking/decorating & then another friend came the morning of to help us finish up the cooking. It was ex.hausting, gah. But it was worth it because I think everything looked fab & it all tasted great too! The menu included: a veggie tray, cut up fruit in these adorbs polka dot candy cups from Shop Sweet Lulu, "mummy" dogs AKA pigs in a blanket, scarecrow crunch, Chick-Fil-A nuggets, cheese dip made by my awesome bestie Britt, sandwich roll-ups & pumpkin dip.

The sweets were the stars though! My girl Britt & I made pumpkin brownie pops, which weren't super pretty, but tasted awesome! The cake was made by my BFF Becky's MIL, who also made my bridal shower & wedding cake...she did such an awesome job! And finally, the cupcakes were from Cupcakes Actually - I had a Groupon for these that I had purchased a while back, so I just sent the hubbs to pick out a dozen the day of the party! I was hesitant to try a new cupcake place because we are pretty hardcore cupcake snobs in the Dennifer household, but these were actually very yummy. The munchkin had one of their pumpkin harvest cupcakes as her "smash cake" & she loved it too. :) Hopefully the photog got good pics of her eating/smashing/making a huge mess of her cupcake because I was in full clean-up mode when she was eating it & had no chance to get a pic, bahahahaha.

And pics in the basement/present opening area (excuse the horrible lighting in our basement)...

 {yeah, I totally forgot to cut the extra ribbon on the right end of the month banner}

{And my cutie living it up amongst all her presents}

I wrapped the picture frames the hubbs had up over the mantle with orange tissue paper & polka dot wrapping paper. On the mantle - I framed her invite using a frame I got via Freecycle that I spray painted black...side note: I really wanted to spray paint the frame a pumpkiny orange, but couldn't find one at any of the stores I checked. :o/ I placed a large professional shot of her in the middle of the mantle, then my DIY #1 ribbon topiary {tutorial with photos coming up soon}. Finally, I hung my DIY monthiversary banner from the mantle to show how my munchkin has changed throughout her 1st year. Love her! I got the inspiration for the banner from Ciao Bambino, but figured I could just make a really cute one rather than buying it & I'm so happy I did because I loooove how it turned out! To make one yourself, just take a long piece of ribbon, get a 2 inch scallop punch & colored card stock, design some {less than 2"} circles with free clip art online & printed on white card stock. Use mini glue dots to attach them to the scallop circles, hot glue a paper clip behind the scallop circle & attach them to the ribbon using hot glue.  Make sure to space them evenly apart & then slide your photos into the clips & wha-la! I was planning to take photos & do a photo tutorial, but I was pressed for time & rushing to get this done. If I do this again, I'll be sure to take step-by-step pics.

For her birthday, she received so many generous gifts from our family & friends that attended the party. Everything from casual to dressy clothes, music toys, books, a portable DVD player + DVDs, her PBK Anywhere Chair {that was our gift}, balls for her ball pit, and I could go on & on.

Oh & to complete mama's birthday weekend, we headed to the local pumpkin patch! She loved the animals, the slides & especially they hayride! She loved it & we had a great time too, so we decided to make it an annual birthday tradition until she says she's too old to go with good 'ol mom & dad, lol.


So those are pmb (pretty-much-basically) the good pics I got. Once I get & select the professional pics I want, I'll share them with y'all of course! And, now that Miss Amaya has had an awesome party, got tons of cool stuff & turned the big O-N-E, what's she gonna do next?! DISNEY...next week, eeek! Wish me us luck, it'll be the first time we take the bambino on a plane. I still have lots & lots to to do...with not a lot of time to do it in. I'm sure I'll be talking more about it here before we head out. Welp, that's all I got for now. 'Till next time!

Tuesday, October 11, 2011

In 3 short days...

My little baby will be O-N-E. I can't believe it & I don't know how to feel. On the one hand, I'm so happy & feel so blessed that she's growing up healthy & doing well. On the other hand she's growing up & I just want her to stay teeny forever. Sigh. I have a special birthday post lined up for Friday that'll recap the first year mostly with pics, but just thought I'd show y'all the professional pics we got done at Picture People this past weekend as well. And at some point, I'll see if my good friend who updated my posts & sidebar title fonts can update the pics in my header too. Anywho, here is my little baby all grown up & almost 1:


:oD <-- That is me cheesing over how flipping cute she is, gah! I love that child. I'll be back lata tonight or early tomorrow with some more DIY par-tay deets. 4 days left till the party!! 'Till next time!

Monday, October 3, 2011

Munchkin's 1st birthday: the full outfit & a DIY Halloween'y wreath + tutorial

If any of you follow me on Pinterest, you'd know that I've been collecting so many ideas to make my munchkin's 1st birthday party memorable. And now with a little less than two weeks till her party, there's SO much left to do!

First, I'm still trying hard to finish up my office/craft space makeover & it's coming along, but I need to buy a few things to do some organizing & right now, all our money is tied up in the munch's birthday party. I also ordered one item from Pottery Barn in July & it was back-ordered to last month, then last month I get an email from them saying it's back-ordered until DECEMBER - seriously PB?! Ugh. So, sadly, I doubt it'll be completed prior to her party, but it has come a long long way & looks great so far! I'll continue posting updates on the space until it's completely done!

Maybe a little over a week ago I got an exciting package in the mail {don'tcha just love packages, wooo} - the other part of her outfit!! Here it is in all it's pumpkin & polka dot glory:


I mentioned it in my previous post about her party, but this adorbs outfit was done up by Amber of Made Cute Just 4 U on Etsy. I can't wait to see it all on her! I think I'll wash it this weekend & try it on her. :)

I have also been making progress on some of my DIY crafting/decor for the party. Project #1: a cute wreath for the door that would go with her party theme, but also be something I can leave up through Thanksgiving...then I saw this on Pinterest & I just knew I had to try it! Well mine is no where near the one on Etsy, but I still like the way it turned out & am so happy I went with the DIY, Also, it was waaay cheaper than the Etsy version!

Here's how my DIY version turned out:


Of course I had to get a pic with my bey-beh in it ::wink::! So what do you think? I really love the way it turned out. Not quite the Etsy version, but that's okay..I still love it all the same! And it's much much cheaper. I think all the supplies I purchased cost less than $20, so I saved like $40, woot!

Okay so to make this bad boy it's simple, but slightly time consuming & messy. Messy because the burlap fibers get literally every.where when you're working with them - on you, on the floor, on your working surface, the dog, etc. And that brings me to the tutorial step numero uno...


Gather up your supplies:


  • 1 square yard of orange burlap
  • wire wreath form (I used a 12" wire form for my wreath)
  • a ruler of some sort
  • scissors
  • glue gun
  • extra glue sticks

Cut out approximately 1.5" wide x approximately 5" long strips of burlap:


You'll need a bunch of these. I found that cutting them out beforehand saved me a lot of time as opposed to cutting out a few, gluing, repeating. **WOD Tip: after cutting out the first strip, use it as a template for all the rest, that way you won't have to continually measure & mark the burlap {like I did, until I caught on...duh Jen!}.


Fold strips in half over a ring of the wreath form & get to gluing:


As you can see, I originally started out with Unique Stitch, but I quickly discovered that: a) it's not strong enough to hold burlap together, and b) even if it was, it takes much too long to dry...ie, if you used this & held each strip together while it dried, then it would take you sooo long to finish your wreath. I found out by a little trial & error...

See how it pulled right apart as soon as I tried attaching it to the wreath form? No bueno. FAIL. So I moved on to my brother from another mother favorite adhesive go-to, my trusty glue gun. And he didn't let me down:


So I just started gluing working the wreath form by section & from the outside in. I forgot to take a photo of the final wreath once I glued all of the burlap strips, sorry! But the final pics basically show what it looked like when I finished. I just added a pretty {polka dot} bow to tie in Munchkin's theme & make it more Halloween'y, fluffed as necessary (do this over a trash can or outside, other wise the burlap fibers will get all over your work space) & hung it up on our front door. I really really love how it turned out & it serves several purposes - party & seasonal decor. Can't beat that!

Want all deets on Munchkin's "Little Pumpkin" themed 1st birthday party? Check out the invites, decor & the initial sneak peek of her outfit here...more coming very very soon! 'Till next time!

Saturday, September 3, 2011

Party Planning: Munchkin's 1st birthday deets!

Oh hai everyone ::waves::! I survived this week - passed my class (woo!) & got a Master's Certificate in Government Contracting! Sounds official right, lol?! I actually have an actual Master's Degree in Public Administration, but got this as well since I had already taken the courses I needed to get one (had to for work) & it's another thing to add to my resume! I also got some real work done too, but boy was it an exhausting week. Amaya started getting sick (congested, snotty, etc.) too, so that added to the exhaustion - not to mention she finally managed to get me sick too. :( Yesterday I felt like I got run over by a truck, but today I'm feeling a little better...not 100%, but better.

Side Note - notice the slightly different (& larger) post title & sidebar fonts? I had to change them because of some change to my previous designer's font hosting abilities. I'm actually saving now for a re-design...not that I don't love seeing my awesome family up there in the header, but I want one that I don't have to update {read: pay someone or beg one of my web-savvy friends to update} & I'd also like sub-page links up top for stuff like a house tour, baby stuff, popular posts/projects, etc. One day...but for now, this is the "new" look. I'm hoping my good friend who re-installed my fonts will also change my header photos for me too! Shout out to our in-the-know IT friend who handled the situation for me...thanks O!!! :oD

Anywho, today I want to share some of the deets on the plans for munchkin's 1st birthday party! I recently got addicted to started using Pinterest to "pin" (kinda like bookmarking, only WAAAY cooler) my ideas for all sorts of stuff {check out the "Follow Me on Pinterest" button on the right hand sidebar, if you have an account - follow me! --->} & I lurve it. I think I've been on it for just about or a little over a month & I have well over 400 pins & 21 pin boards! Well of course I had to do a 
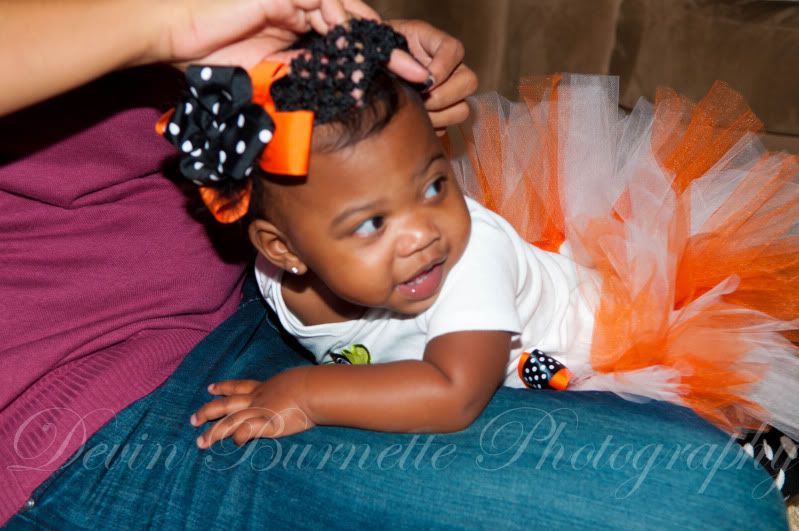
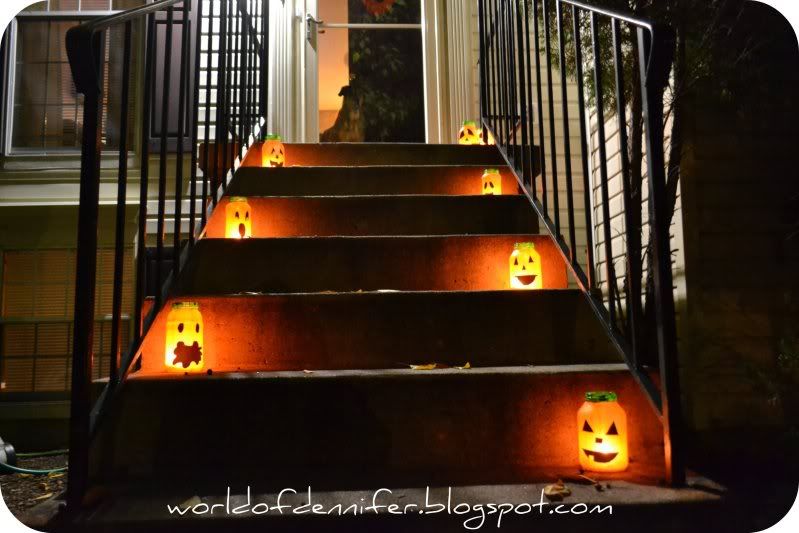
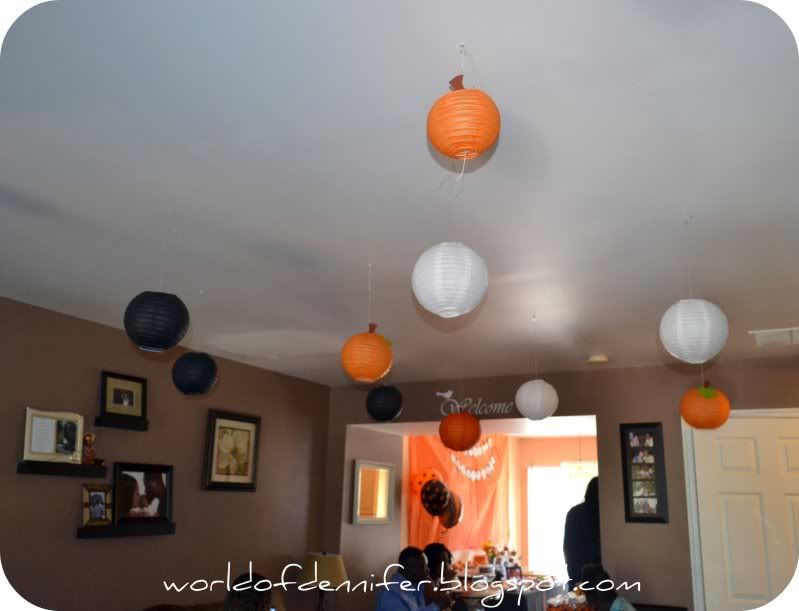
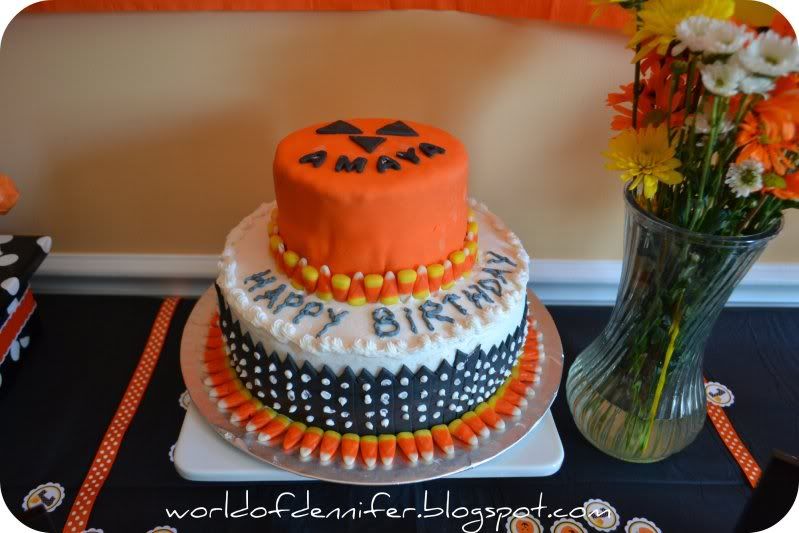
pin board for my Baby AJ's 1st birthday & I've been {& am still} gathering up all my ideas to make her birthday perfect! Hey, I know she won't remember it, but I will & so will our family & I just want to make it so much fun for everyone, hehe. Anyway, after much going back & forth, I decided on a little pumpkin/jack-o-lantern theme for her party since her birthday is only 2 weeks before Halloween & I think it's going to turn out totally adorable!

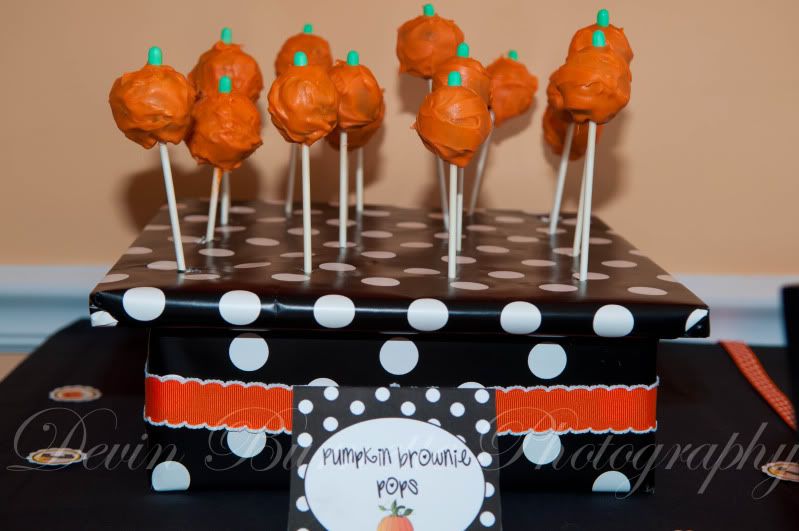
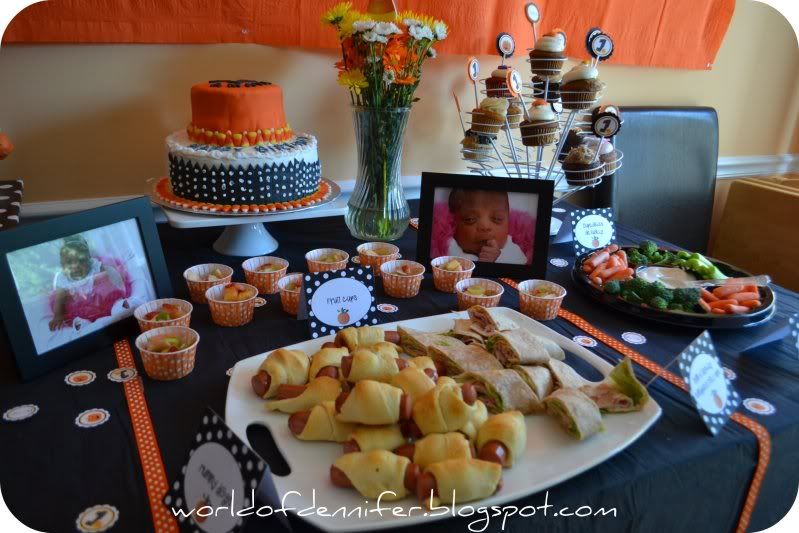
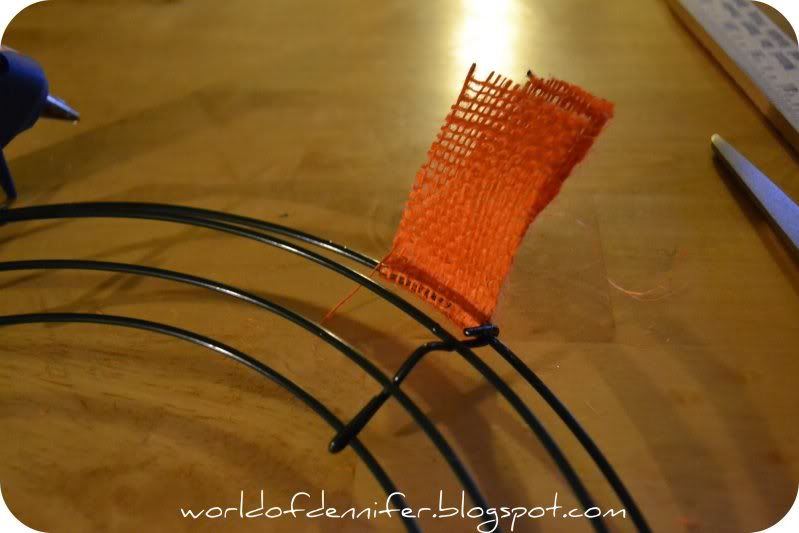
I'm trying to save as much money as possible by shopping around for the stuff I plan to buy/have bought, getting as many things as possible handmade by Etsy sellers (besides the fact that most Etsy sellers stuff is FANTASTIC quality because each item is made just for you), DIY'ing a lot of the decor, making all the food ourselves (minus the cake) & using deal sites (ie, Groupon). Most of the stuff I ordered on Etsy was customized in some way, which brings me to yet another reason I L-O-V-E Etsy, the sellers are so nice, professional & easy to work with! And I have already gotten several things taken care of & ordered, like the invites:


Didn't they turn out absolutely adorable?! LOVE them - they are on order for printing now & I should receive them sometime next week. I plan to mail them out a little more than 4 weeks prior. I actually got kind of emotional ordering my baby's 1st birthday invite. :(

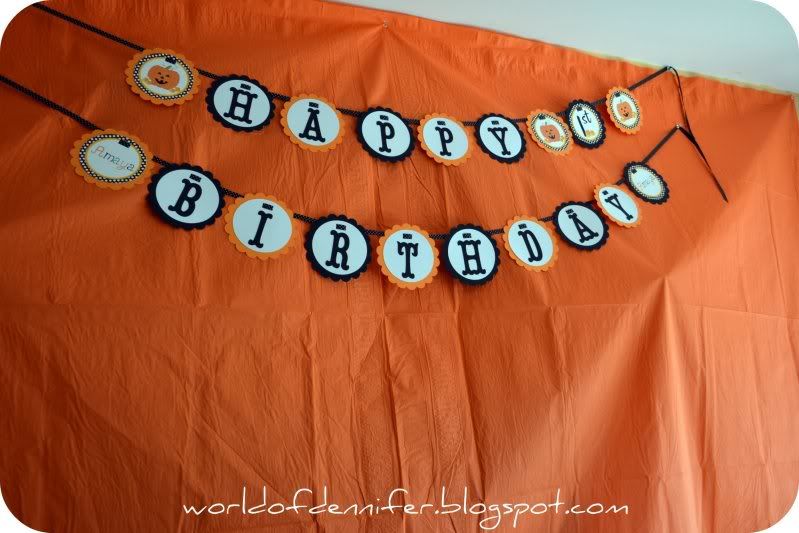
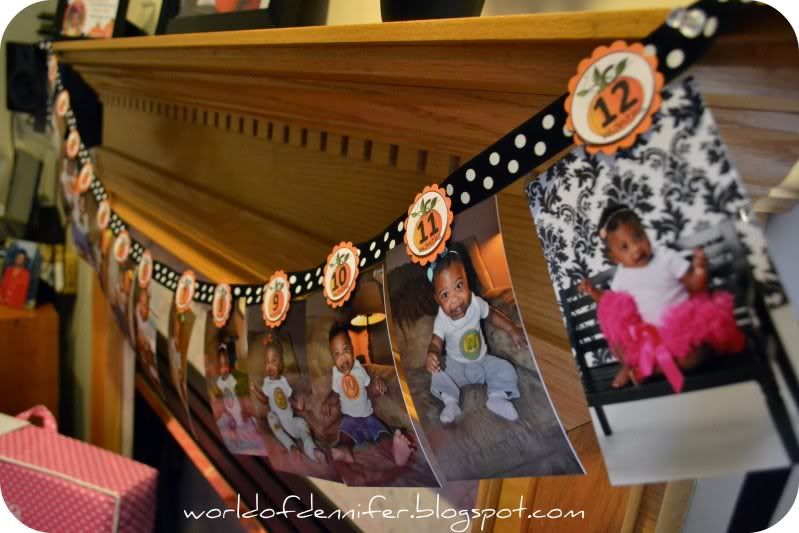
And I got some totally adorable favor tags, stickers, cupcake & a banner. Here's a sneak peak at what the favor tags will look like:
{designed by Ciao Bambino on Etsy}

I'll receive everything a week before the party, so short of the favor tags, I haven't seen everything, but I know it will all be adorable! Can't wait to get the package!!

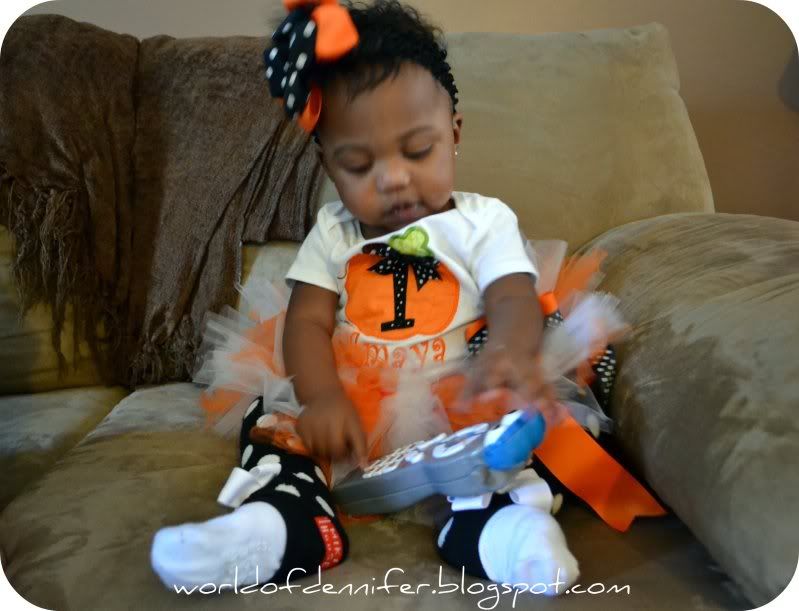
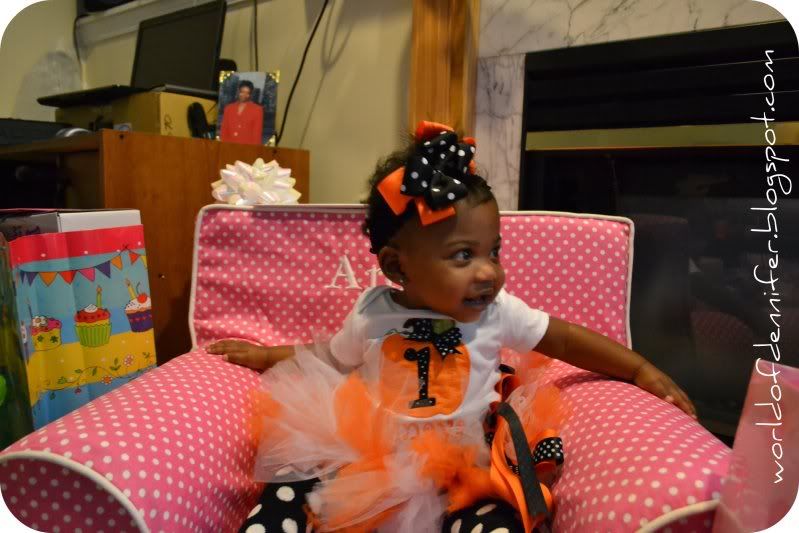
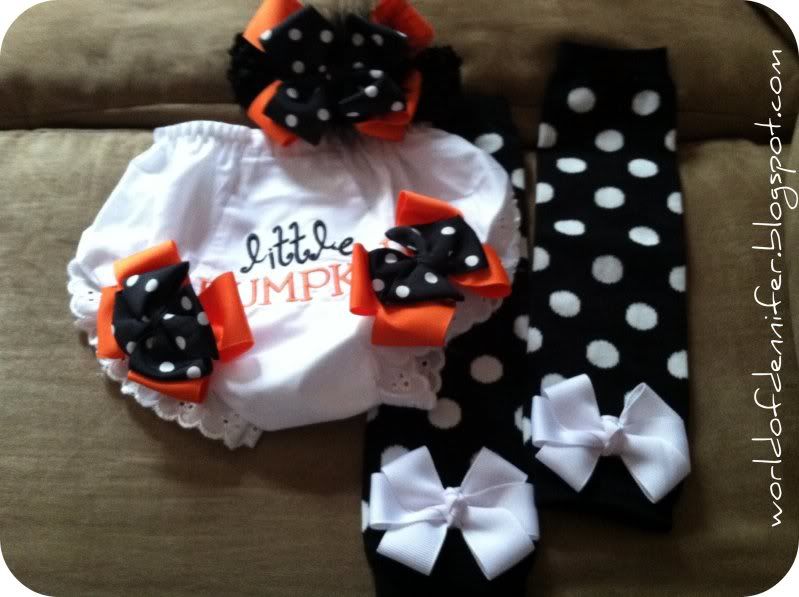
I've also ordered her entire to-die-for outfit & I already received part of it:

{sorry for the photo quality - took this on my iPhone}

::dies:: I seriously just love everything! The diaper cover & matching bow headband {it has black fedora feathers on it!!} are by To Be Stitched and the leg warmers are by 
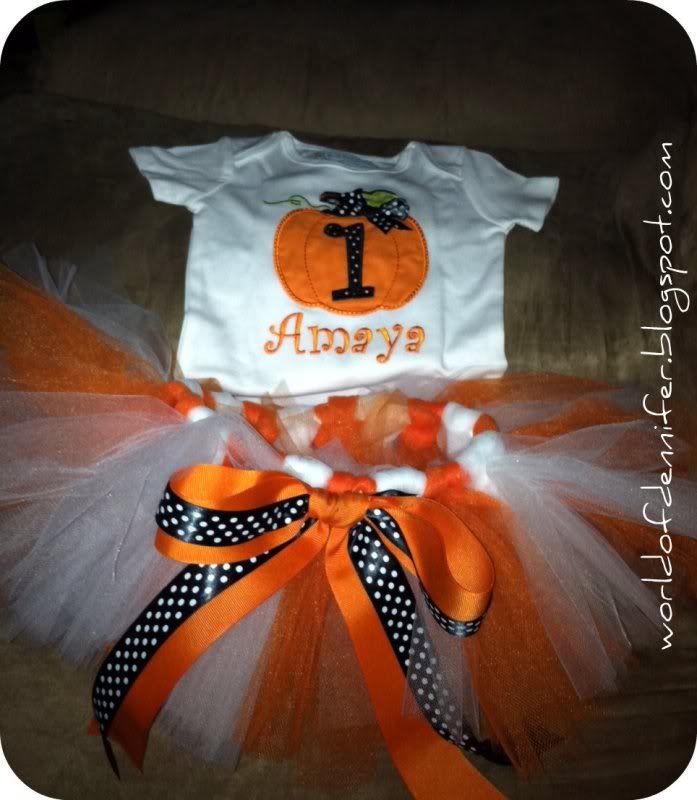
Amy's Buttons & Bows - both on Etsy. I got the rest of her outfit {just got an email tonight that it shipped, woooo!} - a tutu & personalized onesie - custom made by Made Cute Just 4 U on Etsy...here's something similar to what munchkin will be wearing (only hers will be pumpkin themed):


Gah, have I mentioned I heart heart heaaaaaaaaaaaaaart Etsy?! So that's it, get excited - I'll be posting tutorials & lots of pics for all the projects I (& my good friend Haliya - heeey - who I tricked into volunteered} will be tackling! I'm super duper excited to see it all come together!

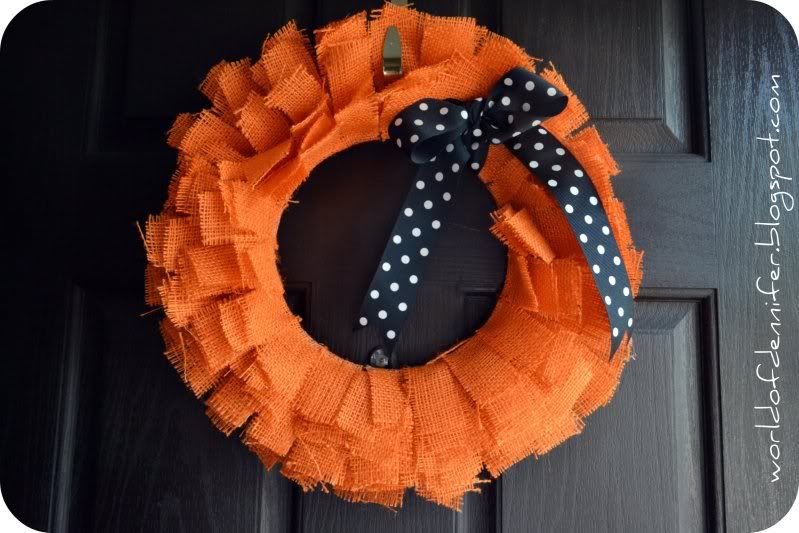
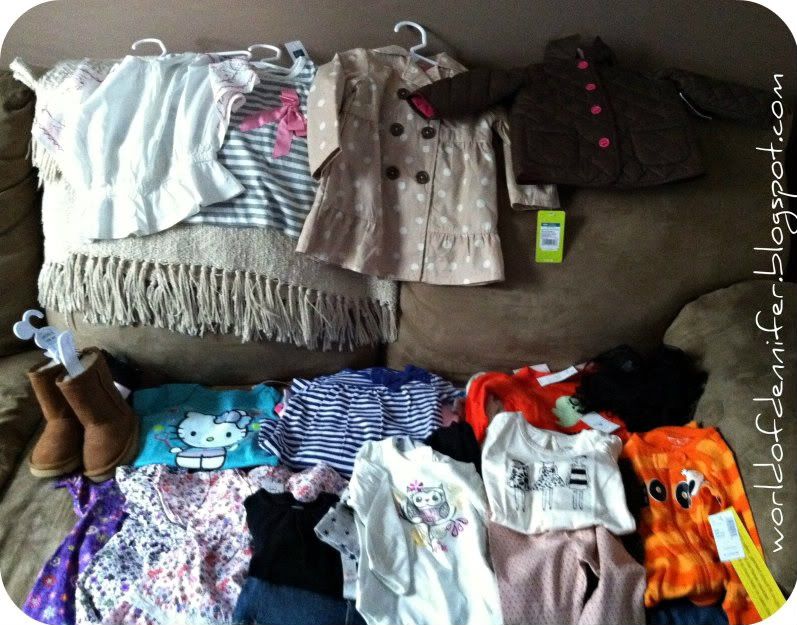
And last side note: I'm only slightly excited for fall {sarcasm...I love fall & I'm totally excited, squeeee!!!}, so I picked up a few things for the munchkin's fall wardrobe during Children's Place, Gap & Old Navy's recent sales...just a few things:

{again, sorry for the quality - took this on my phone too...I'm being lazy, lol}

There are multiple layers under the folded stuff that you can't see. What? What is that you say? That's not a few things...argh, guilty! I can't help it! Girl's stuff is just too freakin' adorable. Add in fall girly stuff & I'm done for. In fact, Gap is having a Labor Day sale right now, so I may have to grab a few more things...honey hide the Gap card! Okay okay, I'll get it together...promise, kinda. Okay, I'm lying. I love buying her stuff - more than I like shopping for me now, never thought it would happen, but it did & so she always looks super cute & I look meh. :o/ Gotta get that together too. Anywho, I digress - stay tuned for another edition of my Project Office/Craft Space Makeover series, Baby AJ's TEN month photos + update & lots more! 'Till next time!