; World of Dennifer: Organizing
Showing posts with label Organizing. Show all posts

Wednesday, June 30, 2010

Shoebox + pretty paper = ribbon storage!

So in the course of my growing crafting obsession, I managed to collect a lot of ribbon. I mean A LOT. And I just realized when I sat down to write this post that it probably would have been a good idea to take a before photo of my previous "storage solution," which consisted of a plastic Target bag inside of a small basket inside of a plastic storage tote in the crawl space under our stairs in the basement. Classy right?! Ha! You gotta do what you gotta do I guess, but the time has come for a change since I keep accumulating ribbon & I may even be getting even more if I start up an Etsy shop for my ribbon mobiles like I am seriously considering doing.

While beginning this quest to make a very crafty ribbon holder, I realized there were very few tutorials out there for the type of holder I had in mind, so I decided to write my own!

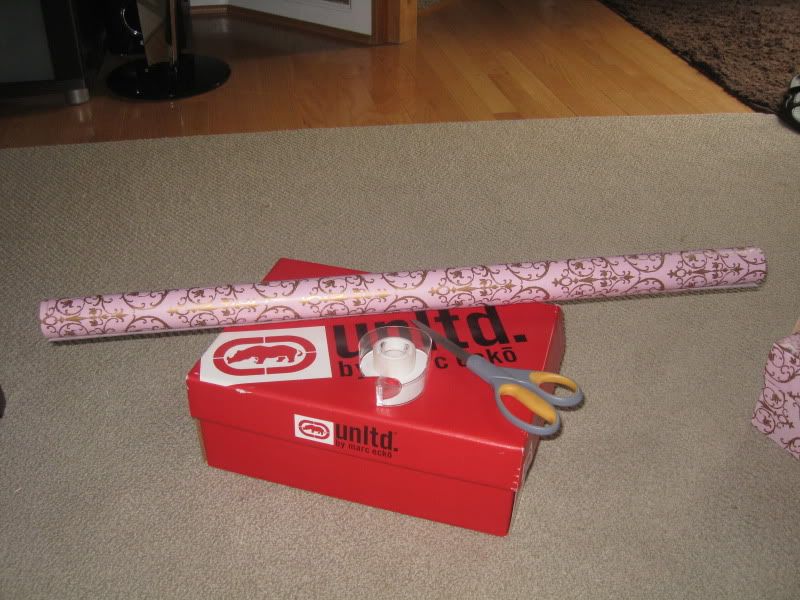
First, I collected up all my supplies:


  • A shoe box (my hubby had plenty to choose from - he must have know I would need them for a project one day :o)
  • Wrapping paper in your color/pattern choice (got mine from Target for a different project & then decided I didn't like it for that project, but that it would be perfect for this one!)
  • Scissors
  • Something to punch holes in your box (Note - I found that my normal hole punch was too short & the holes would be under the lid of the box, so I improvised (with the help of my hubby) & used an old wine bottle opener & a mechanical pencil - with the lead pushed in - to make the holes a little bigger. Hey, I was trying to do this project w/o spending any money!)
  • Tape (I originally started out with Modge Podge on box #1, but quickly switched to tape - it's easier to correct mistakes like that).

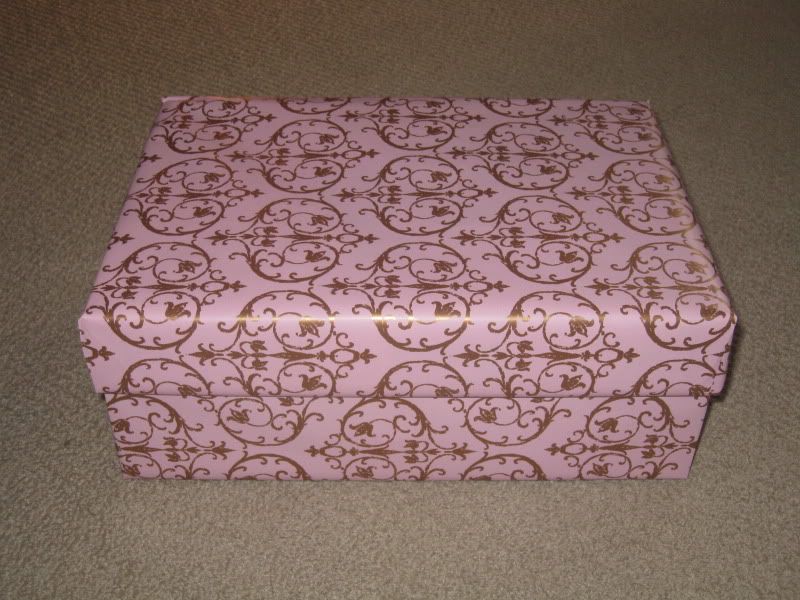
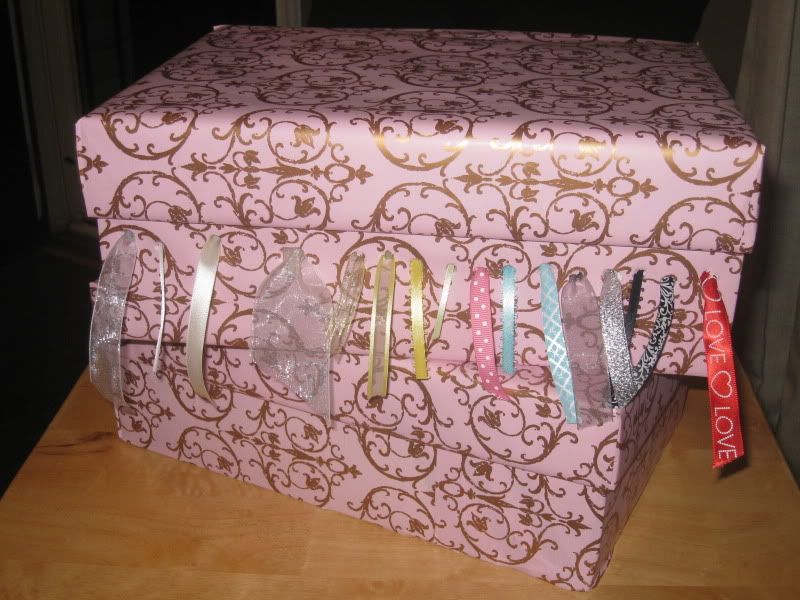
Next, I got to taping - all sides & the top, but I left the bottom mostly uncovered since it won't be seen. :oD

So much prettier covered in wrapping paper, isn't she?!

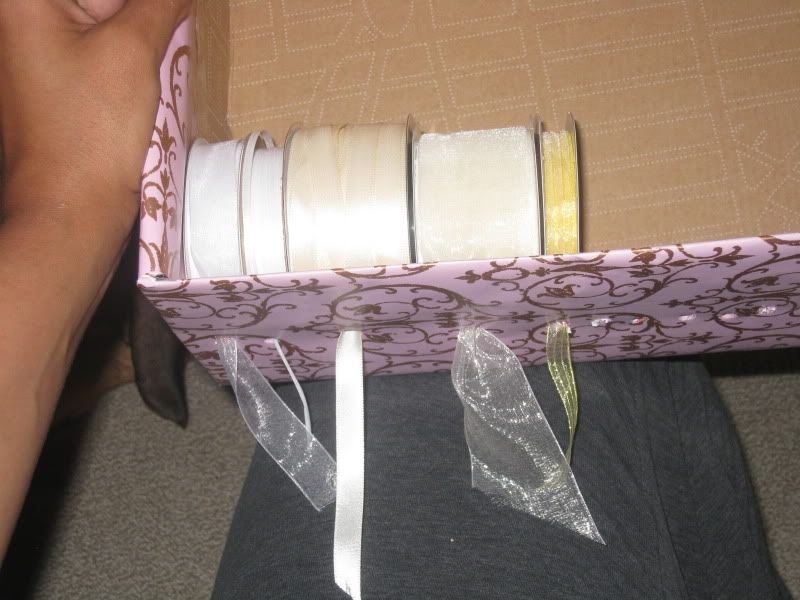
After that, the hubbs helped me devise a plan to get the holes where I needed them, which is below where the cover hits on the front face of the box. He came up with the cheapo genius idea to use an old wine opener that we don't use much any more & then we used a pencil to make the holes a little bit bigger.

That's him poking the holes - he's my favorite tool. :)

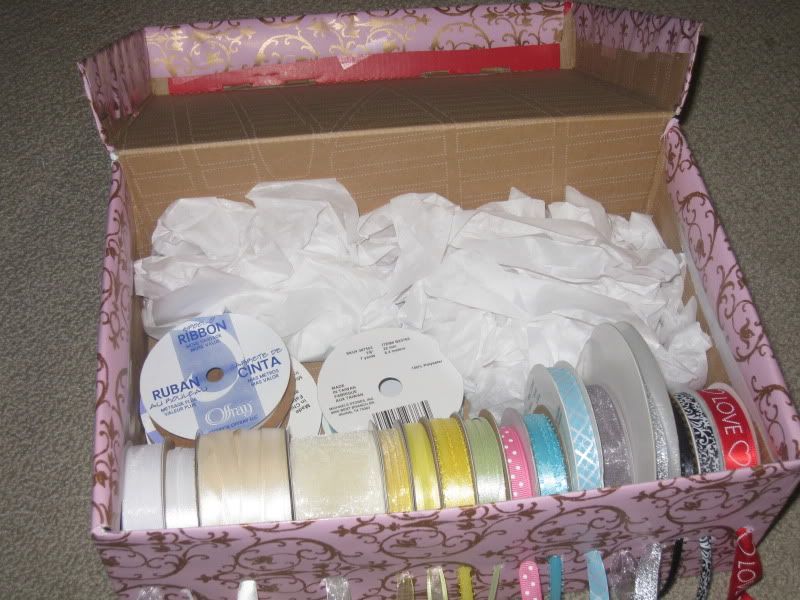
Once we got the holes in the box, I arranged my ribbon by color & started threading it through the holes my hubby poked in the box for me. I had to make bigger holes for some of the ribbon as I went along.


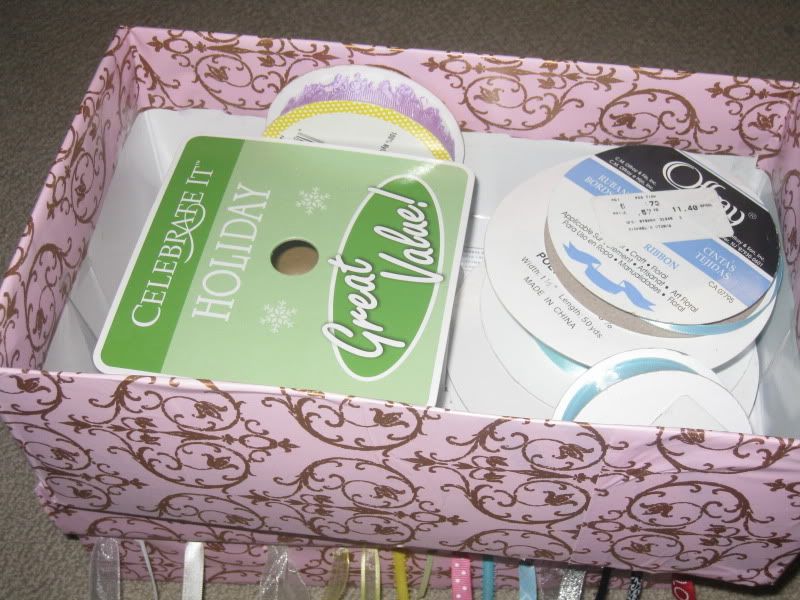
I put some extra spools of duplicate ribbon in the back section of the box, along with some spare tissue paper I had laying around to stop the threaded ribbon from rolling around in the box whenever I move it.


In my second box, I put my oversize spools of wide ribbon & ribbon that was almost gone. I didn't see a real point in threading it through my box if it was almost gone.


And ta-da - a DIY ribbon storage solution & I have plenty of extra wrapping paper & an extra shoe box if my ribbon-collecting addiction continues & I need to make another. 


And the best part about it...it was my favorite price - FREE because I already had all of the supplies on hand! What do you think?! I love it & it's perfect for me & it'll go perfectly on the bookcase I plan to put down in my little corner of the basement since the babe's stuff is in my former office/crafting storage area. So what about you - do you have lots of ribbon or other crafting materials that you have organized in a thrifty & clever way? I'd love to see it - comment with a link to your blog post if you have one! If you have lots of ribbon & are looking for a way to organize it, then you should definitely try this solution out - it's quick, easy & pretty inexpensive (possibly free if you have everything on-hand, like I did). If you try it out, please let me know, I'd love to see how yours turns out. And now this pregnant mama is off to bed - 'till next time!

Saturday, June 5, 2010

18 Weeks - my lil sweet potato!

Whaaat? On the actual day I turned 18 weeks - unheard of! I'm trying to be punctual & also I've been on the computer for the last little bit just browsing & what not, so I decided I may as well post my weekly post....on time for once.

We are planning on registering for Baby J's shower in a few weeks, so I have been looking through all my options on various baby items, which is a pretty daunting task. I want to avoid getting a bunch of big, bulky things that we will never use. My house is not that big & I despise clutter. Speaking of - I am now worried about where we will put all the baby bottles & what not in our kitchen. I have a pretty big pantry, so any food-type items or formula (planning on BF'ing, but keeping an open mind about the possibility of formula feeding if necessary) can go in there, but I'd like to keep non-food items out of there. Hmmm, perhaps we will need to clean out the area under the island where our pots & pans are & get rid of a lot of the stuff we don't need anymore. We have been talking about buying a new set, so maybe I'll talk to the hubbs about actually getting on that purchase, so we can move the Tupperware from the cabinet & under the island next to the new pots & pans.  Then we can put all the Baby J stuff in the cabinet where the Tupperware is now. Guess that's something to add to my growing list of things to do before Baby J arrives! It's like a whole new person with a whole new set of stuff coming to live in your house, lol. I guess that IS in fact what's happening, huh?! But I'm definitely not complaining...we can't wait till our little girl gets here in November & all her {cutesy} stuff. :)

Oh & today I ordered the cutest custom little onesies for my hubby for Father's Day. They are sorority/fraternity related & so cute! I always swore I'd never buy those things that say "Future {enter name of sorority here}," but since we are in brother/sister fraternal organizations, I got some cute non-Baby J future predicting ones for my hubbs. I think he'll get a kick out of them & they are only $10 each, so  they didn't break the bank either. I'll probably also get him a new grilling tools set - he's always on the grill anytime we do BBQ's, so I think he'll appreciate some new tools. I'll post pics once I get everything in!

This week, baby is the size of a sweet potato! She's getting so big & I'm pretty sure I am really, for real this time feeling her move! A couple days ago I started feeling something down low in my pelvic area that felt like popping popcorn. I'd heard other mamas describe their baby's 1st movements like this & I know for sure this is exactly what I'm feeling. So exciting. Keep moving away baby girl! The Bump confirms she's spending her time moving away in there - kicking, punching, rolling, hiccuping, twisting, etc. So cute. I wish I could have a look at her every day. :oP In other news, my side of the bed is turning into a pillow fortress. My poor husband can't even cuddle me {he loves it ;oP} b/c I have pillow behind me, in front of me, two between my legs & under my head, hahaa. I REFUSE to buy one of those maternity pillow thingys b/c what in the heck will I do with it after the baby is born? And as I mentioned, I despise clutter...so pillows it is for me!

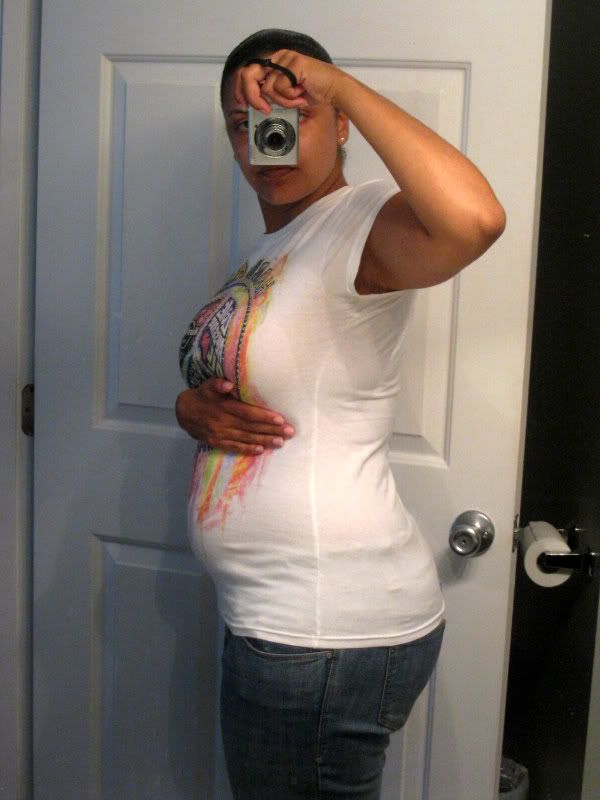
And two people at work this week, including my team leader, mentioned something about me showing! So happy that I don't just look fat, haha. Here are this week's bump pics @ 18 weeks exactly:

Clothed Belly

Bare Belly

And now I'm going to lay down & probably pass out for the rest of the night. I have some shopping I'd like to do tomorrow & I also want to fit in a mani/pedi/eye brow touch up - it's quite necessary right about now. 'Till next time!

Monday, February 1, 2010

Living Room Updates!

IDK if you remember what our LR looked like before, here is a reminder:


I can honestly say that I loved my LR. I liked the colors & everything, but as soon as winter came around, the deep oranges were no longer working for me. I felt like we needed something a bit more neutral. So I made a few small changes & wha-lah...looks like a whole new room:

In the photo above, you can see that I added insulated curtains from JCP in ivory beige. These curtains were such an awesome buy. They were inexpensive & definitely good quality. The window they are on tends to be a little drafty b/c the spring thingy on it is messed up (we need to get it fixed), but when you close those drapes, the draft is GONE! They are awesome.I also used JCP's Ancient Broze Clip Rings to hang them - 14 did the trick!

Under the wedding photo, next to our front door, I added the Target Storage Ottoman in dark brown. It was originally $80, but when I went to the store, they were on sale for $65 & I found a damaged one on the shelf (nothing the hubby couldn't quickly repair), and got $15 off!! The dark brown pillows on top, I purchased a few months ago at Burlington, for about $7 each, but I'll include them in the cost for this makeover. And the small paisley print pillows on the couch & ottoman were $13 for the pair at Home Goods.


The candles/pillar holders to the right of the TV, I used to have in my DR, so those were re-purposed & use here to add a little something to the entertainment center. IDK if you can see it well in this picture, but the remote caddy (awesome invention!) is so great because it keeps the THREE remotes we have to the TV/entertainment system/Verizon Fios Box all neatly in one location....it evens comes with a set of four leather coasters, which is great for me since I loathe when people sit sweating glasses on wood tables! And it was only $20 from B,B&B! We used one of our 20% off coupons we got in the mail & saved $4!


I got this pretty new white framed mirror from Home Goods for $30, which was a steal b/c it is really high quality & pretty sturdy. I put it in the entryway between my LR & DR, right across from my entryway table & I think it's a perfect fit in this area.


The sign I got for free from an awesome blog friend's giveaway! I decided to keep it on the table until I decide on something else to put there. :oP

New for 2010 at the World of Dennifer, I am going to start providing a cost break down on my makeovers b/c I thought it may be helpful to some of you interested in doing something similar somewhere in your home. So here is the cost break down for this mini-makeover:
  • Curtain panels: $35/pair
  • Clip rings: $20
  • Storage ottoman: $50
  • Dark brown throw pillows: $14/pair ($7/ea)
  • Paisley print pillows: $13/pair
  • Remote caddy: $16
  • Mirror: $30
  • TOTAL: $178
So what do you think? I really like it & the LR feels a bit larger now with the couches rearranged, so that's an added plus! And at less than $200, I think these small changes made a huge difference in my LR!

Thursday, November 19, 2009

Clearing out the clutter!

So I know in several of my previous posts about our Master Bath re-do, I have mentioned cleaning out the clutter under our sinks, like here & here. Well last night I FINALLY completed the task! Yes, yes I realize the slackerness (is this even a word?!) was running PRET-TY on high on this one. However, I got it done...please lay your eyes on the before of this area AKA Exhibit #1:


Super embarrassing! How did I let that clutter get THAT out of control?!  Well anyways, last night while watching my husband do all the work finishing up some of the final items for the big reveal of the bathroom, I decided to go ahead and finally tackle this project & I'm so happy I finally got it done. Behold the clean, organized afters AKA exhibit #s 2 & 3:

*my side*

*the hubbs' side*


Ahhh...so much cleaner & much much more organized! I just took some contact paper, measured it to the correct size & cut it to fit under the counters, bought the baskets from Marshalls & got rid of the junk that we had under the cabinets, but didn't ever use. Just looking at it makes me feel better!

We are nearly done with the big Master Bath project & should finish up the last few to do's in the next few days. I can't wait to share the final reveal with you guys...believe me it's worth the wait! In the mean time, I will leave you with my *updated* Master Bath project to do list (I removed the items that were previously completed):

  • Buy the mirror framing materials, prime/paint it & put it up
  • Paint second coat on vanity & do any necessary touch ups
  • Install the new faucets
  • Steam & put up the new shower curtain
  • Clean out under cabinets, put down contact paper & organize stuff into baskets
  • Clean entire bathroom
  • Assemble over toilet storage furniture & add fabric cover to glass doors
  • Put cabinets back on vanity & install new hardware
  •  **ADDED** - put up wall art purchased from Kohls & decide if additional decor touches are needed (I think they will be, but we shall see)
Almost done! Yay! :o)