


While beginning this quest to make a very crafty ribbon holder, I realized there were very few tutorials out there for the type of holder I had in mind, so I decided to write my own!
First, I collected up all my supplies:
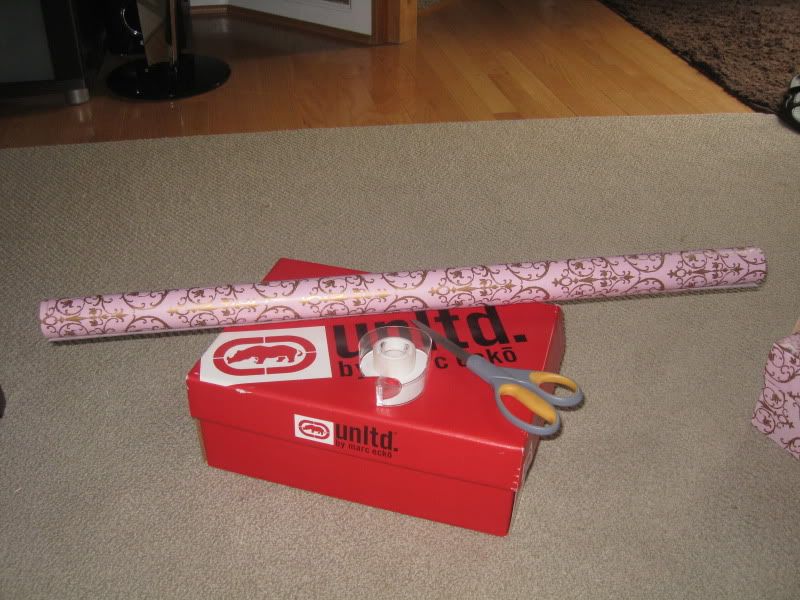
- A shoe box (my hubby had plenty to choose from - he must have know I would need them for a project one day :o)
- Wrapping paper in your color/pattern choice (got mine from Target for a different project & then decided I didn't like it for that project, but that it would be perfect for this one!)
- Scissors
- Something to punch holes in your box (Note - I found that my normal hole punch was too short & the holes would be under the lid of the box, so I improvised (with the help of my hubby) & used an old wine bottle opener & a mechanical pencil - with the lead pushed in - to make the holes a little bigger. Hey, I was trying to do this project w/o spending any money!)
- Tape (I originally started out with Modge Podge on box #1, but quickly switched to tape - it's easier to correct mistakes like that).
Next, I got to taping - all sides & the top, but I left the bottom mostly uncovered since it won't be seen. :oD

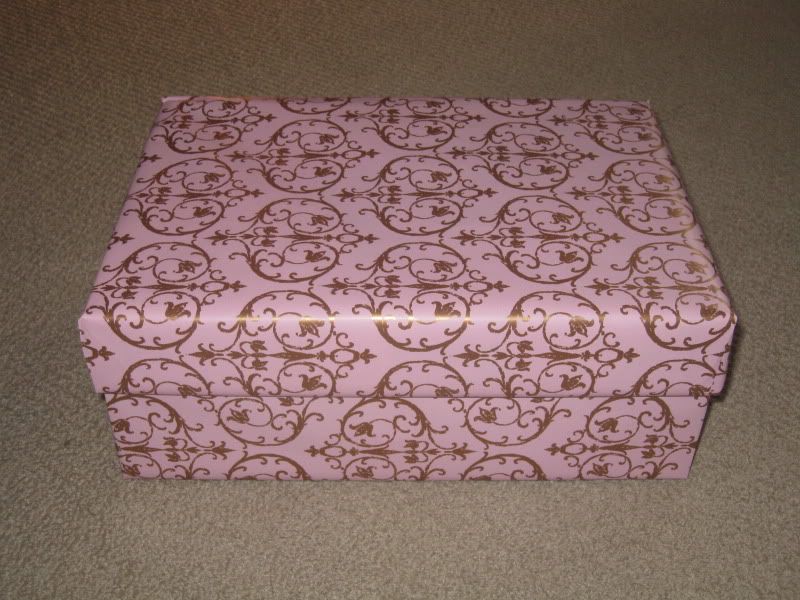
So much prettier covered in wrapping paper, isn't she?!
After that, the hubbs helped me devise a plan to get the holes where I needed them, which is below where the cover hits on the front face of the box. He came up with the
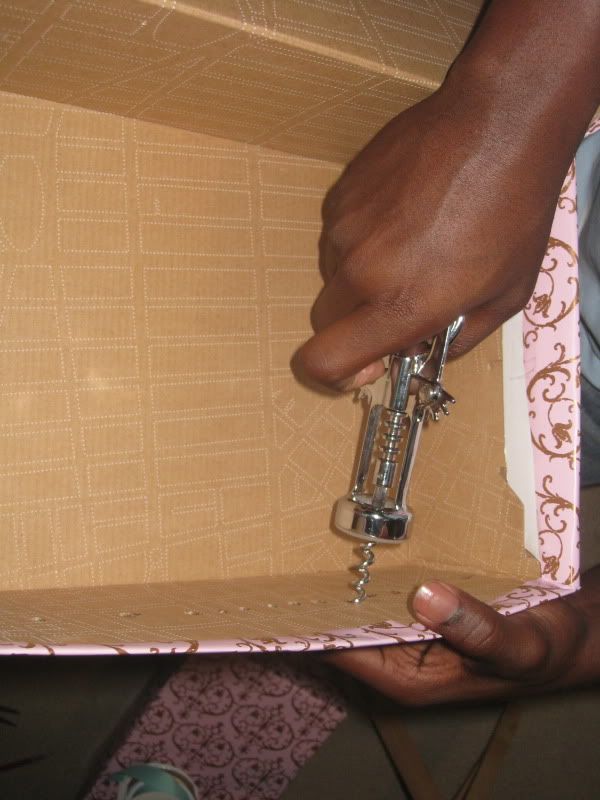
That's him poking the holes - he's my favorite tool. :)
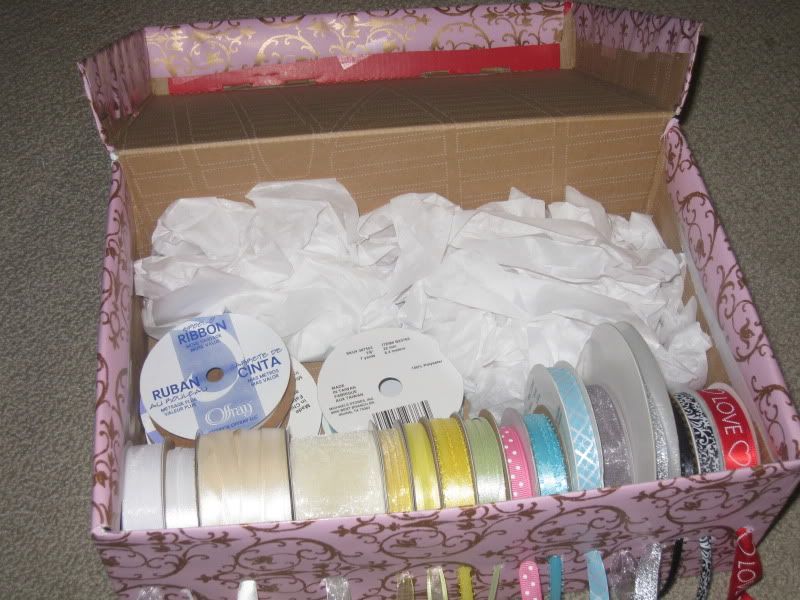
Once we got the holes in the box, I arranged my ribbon by color & started threading it through the holes my hubby poked in the box for me. I had to make bigger holes for some of the ribbon as I went along.
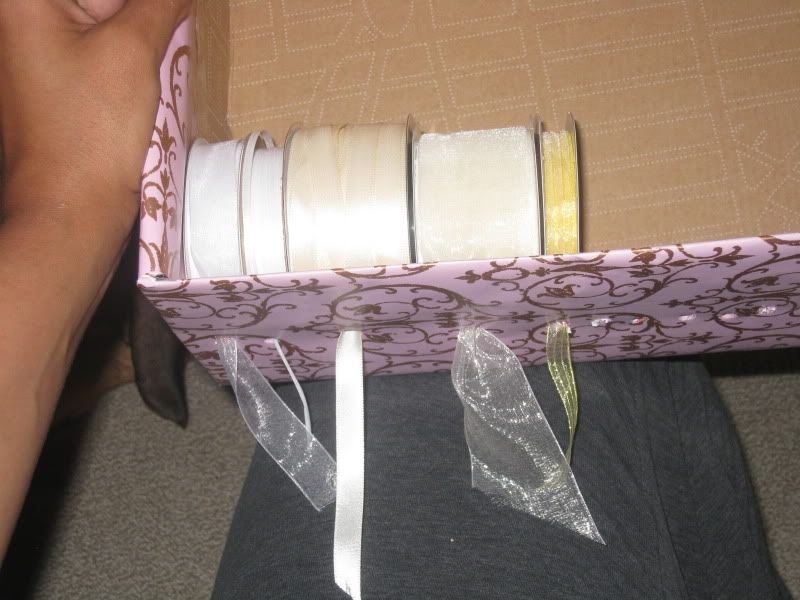
I put some extra spools of duplicate ribbon in the back section of the box, along with some spare tissue paper I had laying around to stop the threaded ribbon from rolling around in the box whenever I move it.
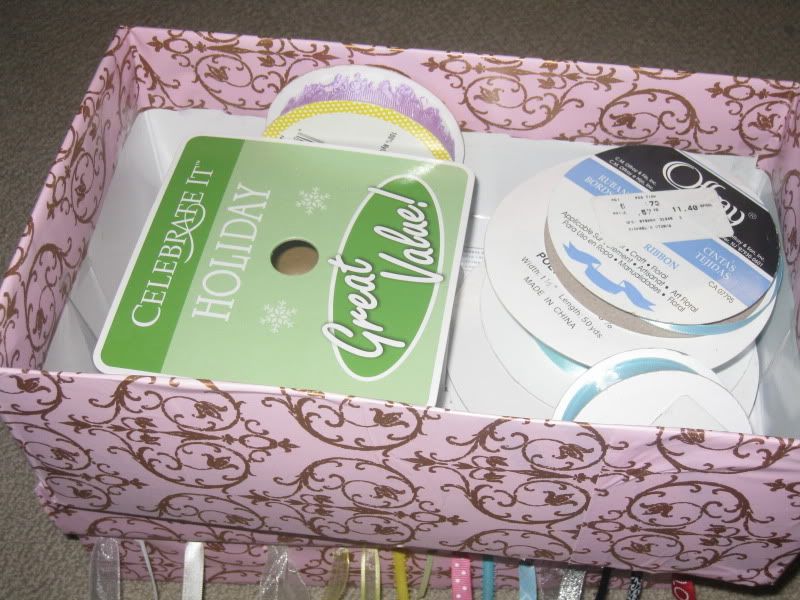
In my second box, I put my oversize spools of wide ribbon & ribbon that was almost gone. I didn't see a real point in threading it through my box if it was almost gone.
And ta-da - a DIY ribbon storage solution & I have plenty of extra wrapping paper & an extra shoe box if my ribbon-collecting addiction continues & I need to make another.
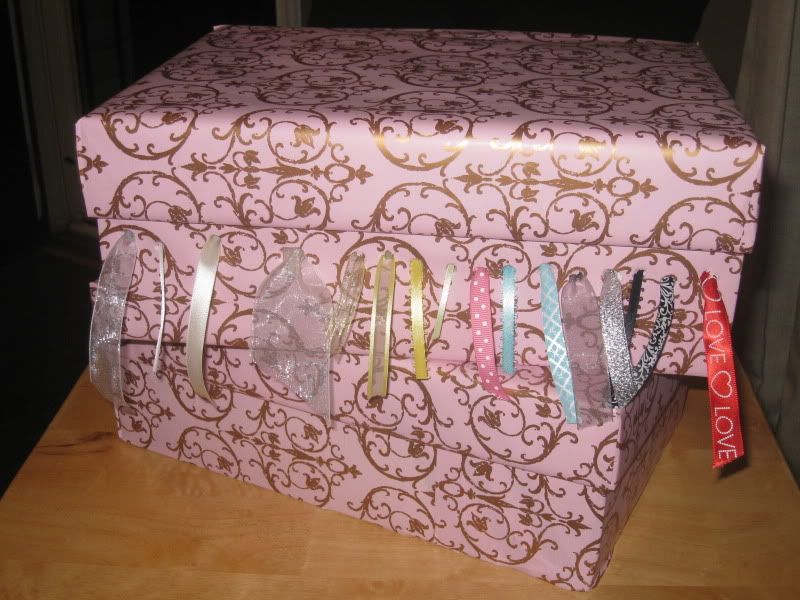
And the best part about it...it was my favorite price - FREE because I already had all of the supplies on hand! What do you think?! I love it & it's perfect for me & it'll go perfectly on the bookcase I plan to put down in my little corner of the basement since the babe's stuff is in my former office/crafting storage area. So what about you - do you have lots of ribbon or other crafting materials that you have organized in a thrifty & clever way? I'd love to see it - comment with a link to your blog post if you have one! If you have lots of ribbon & are looking for a way to organize it, then you should definitely try this solution out - it's quick, easy & pretty inexpensive (possibly free if you have everything on-hand, like I did). If you try it out, please let me know, I'd love to see how yours turns out. And now this pregnant mama is off to bed - 'till next time!


1 comments:
What a great idea - it's beautiful!!
I found you on Friendly Friday and I'm so glad I did.
I hope you'll follow me back!
Kelly
http://KellysLuckyYou.blogspot.com
Post a Comment