


Not literally "planting," but we did put one up! Remember this pic of packaged goodies we got in the mail from my most recent pregnancy post?
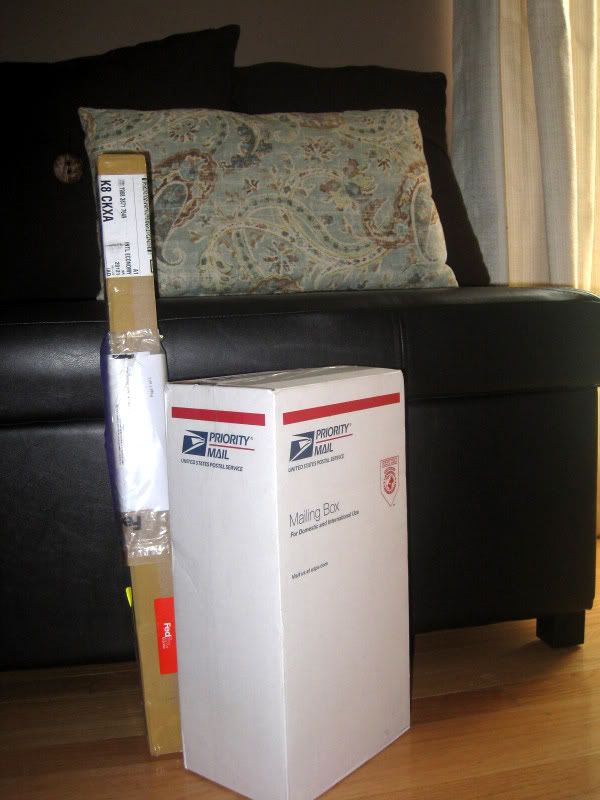
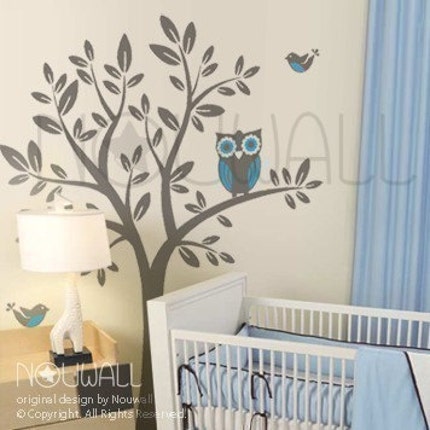
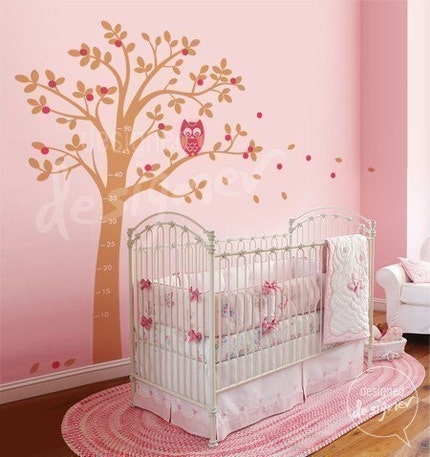
...And remember how I said the tube held something else exciting for Baby J?! Well, it IS - something very very exciting - her tree decal for her wall! Tree decals, painted trees & tree art in nurseries & kid's rooms are all the rage lately, case in point:


Beautiful nursery & little girl's room featured on Design Dazzle

Noodle's adorable birdie themed nursery from Carrie @ Making Lemonade

Gianna's ca-ute nursery from Mrs. F at As the Forest{e} Grows

Delia's pretty nursery from Danielle at Growing a Lemon
And I'm lovin' the trend too, so I decided to do it in Baby J's nursery! First I scoured Etsy for the perfect decal - it came down to a heated battle between the hubby & I over my top two faves, so we did what we always do to make important decisions - we played rock, paper, scissors! Hahaha...seriously though - we did. I
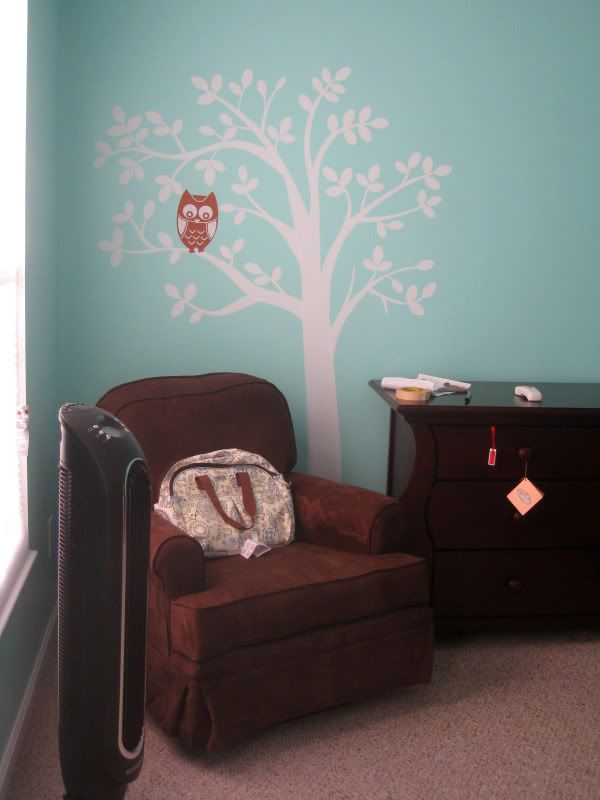
My original first choice by Etsy seller Nou Wall...
And the Mr.'s choice {and what we ended up going with} from Etsy seller designed Designer...
I like certain things about both decals. For my #1 choice decal I liked the owl better & if you have been reading my blog for any length of time, you could probably just glance at my first choice & know that my most favorite part of the decal were the little birdies that come along with it {I LOVE birdies}! And as for the Mr.'s #1 choice, I loved that the tree was blowing/swaying, love the berries & thought the owl was also pretty cute too! So, like I mentioned, we decided to go with the Mr.'s choice in the end & I'm so happy we did because I think it looks fab in our baby girl's room!
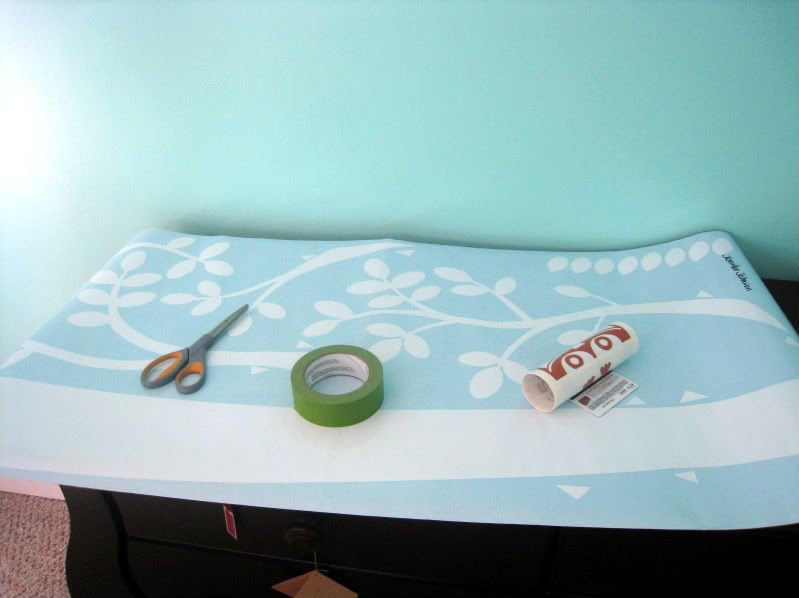
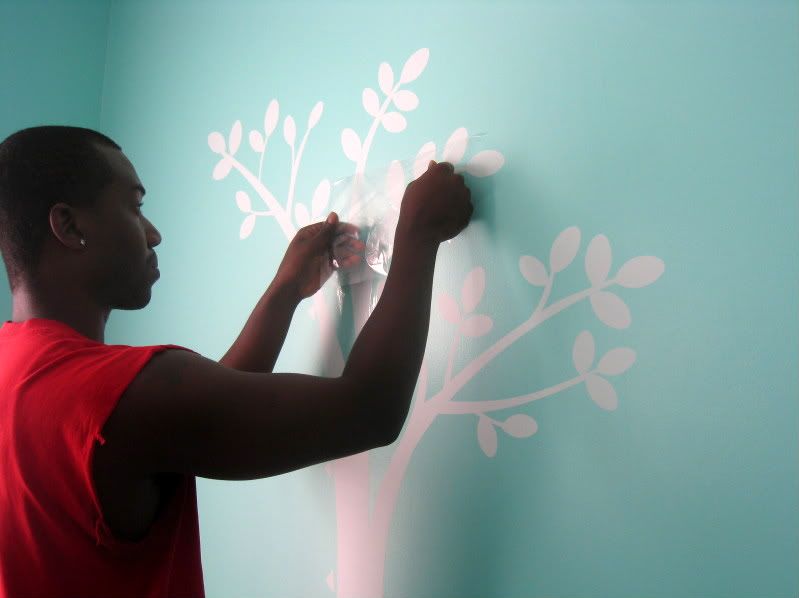
First, we got all our supplies together based on the instructions that came with the decal: masking tape (we started out with Frog Tape, which is pictured, but switched because it wasn't doing the job), scissors, plastic credit-type card (we used an old ID of the hubbs & an old gift card) to smooth out the decal.
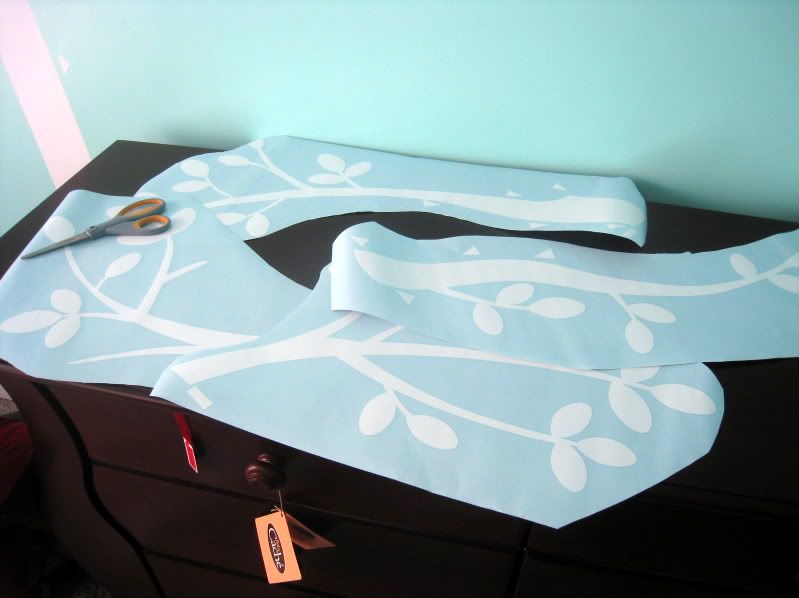
Next, we went section by section (& there were a lot of sections) carefully cutting out the tree trunk & branches into smaller, more manageable pieces. **World of Dennifer (WOD) tip: cut out as much "dead" space as possible...it helps cut down on the time it takes to put up each piece.
Then, by section, we taped up each piece on the wall & positioned it where we wanted it to be on the wall/in relation to the other already adhered pieces. **WOD tip: this part can get a little cumbersome with the branches, but I highly recommend doing this for each large section because it helps to see it up on the wall & with the other parts of the decal that are done before you adhere it to the wall.
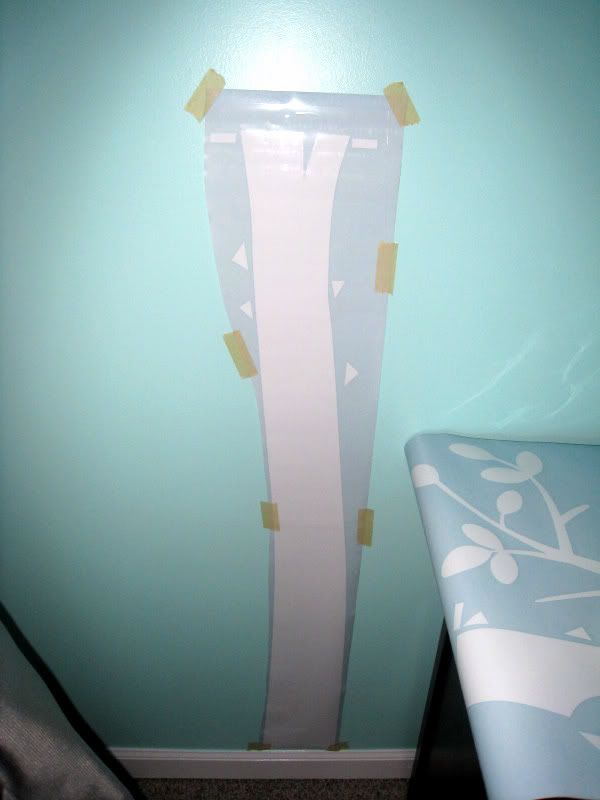
Once the decal piece is positioned to your liking, remove the paper backing from the bottom & lightly place the decal on the wall by hand without moving it from the position where you had it taped (you will need to remove the paper from bottom to top & remove the tape in the same manner). Once it is on the wall, use the plastic credit-type card to push down the decal on the wall (try to push pretty firmly) - work from the middle of the decal to the ends. **WOD tip: it is okay if, when you start putting on the branches, that the decal pieces overlap a little bit - it's all the same color, so you really can't tell it's overlapping & it's necessary at times to correctly position the branches to your liking.
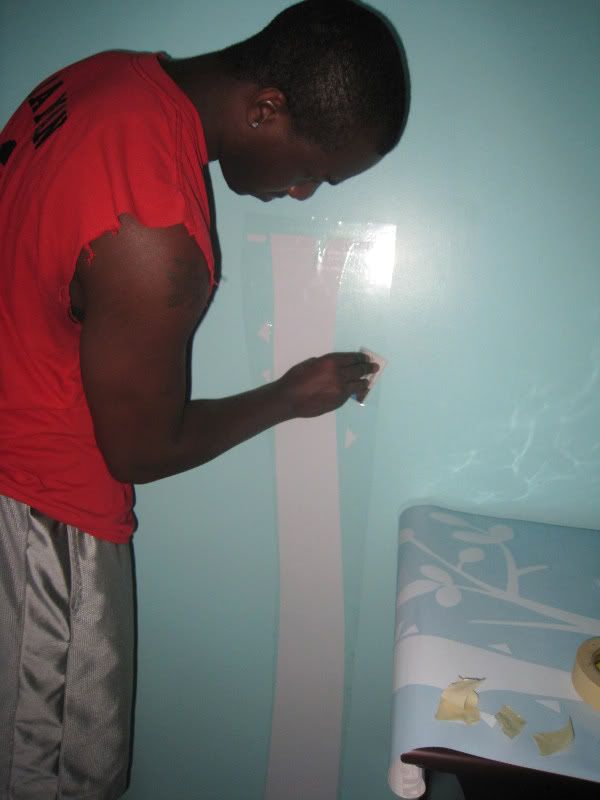
Then, carefully peel off the clear vinyl protective cover from the piece you are working on. **WOD tip: be very careful removing the clear vinyl cover because sometimes it is necessary to overlap small parts of the clear vinyl on pieces that you have already finished & you don't want to pull too quickly & pull up those previously finished pieces on accident!
Continue the above steps with each piece/section - we did largest piece to smallest piece - until the tree's main structure is adhered to the wall.
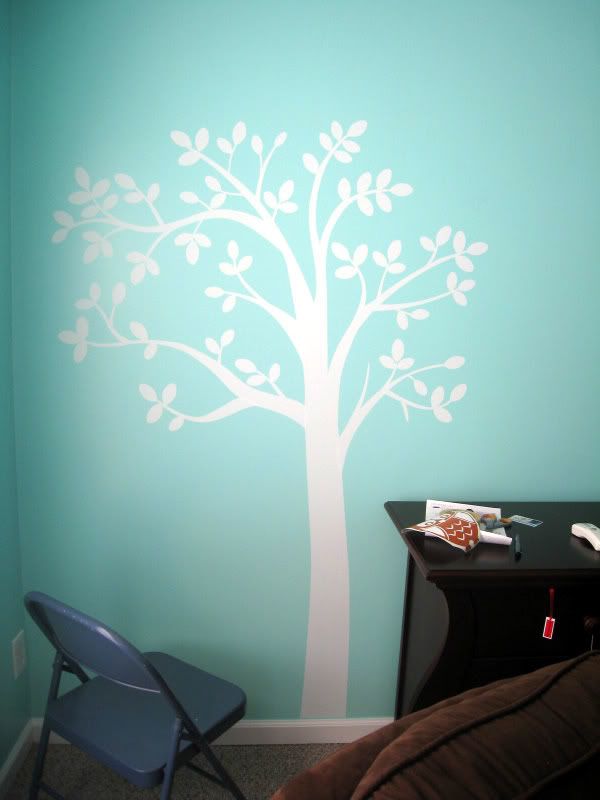
Finally, using the same directions above, we positioned & adhered the owl where we wanted him on the tree. So, that's how we "planted" a tree in Baby J's nursery - we can't wait to rock her in the glider, sing her lullabies & read her bedtime stories under the tree!! And just because I heart before & afters - here is a look at what that wall looked like before we "planted" the tree:

And here's what it looks like now:
More to come on the rest of this wall soon. So what do you think?! We love the way it turned out...in fact, the day we finished it, we couldn't stop looking in her room at the wall!! Wanna see our nursery progress from the beginning? Check out my master plan for the room & the first set of DIY goodies I made for our little girl, the major furniture all put together, my cute owl accent finds & decision to do a understated owl theme in her nursery, and my "Owl" Bean Bag score turned FAIL! Enjoy. :) 'Till next time!


4 comments:
Adorable!
how beautiful!!! I love the tree, so pretty it really makes the whole room! what a cool idea for babies rooms, I didn't know they were in style but now I can see why!
Oh my goodness, how adorable! I LOVE the tree in the nursery! LOVE IT! And the little owl is the cutest thing!
I love it! The owl theme is going to be SO cute!
Post a Comment